-->

Final Flight Departure Procedures: Flight Departure Processes Part 3

In this blog series on flight departure processes we have covered engine starts, taxi checks, run-up checks and more. Now it’s time to run through the final flight departure procedures and take to the skies!

Use the TMPFISCH acronym

The proper acronym that applies whenever holding short is TMPFISCH, and it is what I usually use for my operations here in Hong Kong. It goes like this:

T – Trims set to the appropriate take-off position

M – Mixture rich, master on and magnetos on both

P – Primer in and locked (or fuel pump off)

F – Fuel is sufficient for the coming flight and flaps are set

I – Instruments’ Ts and Ps are in the green range

S – Switches (landing and strobe lights on)

C – Controls full and free

H – Hatches secure and harnesses secure

When you do your controls part of this departure check, make sure your box the controls. That means to move the controls in a movement of a box and ensure you have still got adequate freedom of movement. You might have a mile-long taxi, and something might have jammed the controls. Never skip this check as part of your final flight departure procedures.

Deliver your safety brief

You can do the EFATO brief (Engine Failure After Take-Off ) at any stage before the take-off, but I typically do it after run-ups. A typical brief should describe the actions that need to happen in the event of an engine failure at particular stages of the flight, such as:

During take-off

After rotation

Below 200 feet and with runway remaining

Above 200 feet with no runway remaining

Above 700 feet.

The brief goes something like this:

“If we have an engine failure on the ground, we stay on the ground. If we have an engine failure below 200 feet, we land on the remaining runway. If we have an engine failure above 200 feet, we land straight ahead or 30 degrees to the side. If we have an engine failure above 700 feet, we will turn back to find runway X.”

On a standard Cessna or Sling, 700 feet is plenty for a runway turn-back manoeuvre. However, during the turn back you MUST lower the nose to maintain airspeed and limit the angle of bank to 45 degrees. Never attempt a runway turn-back if an engine failure occurs below 700 feet!
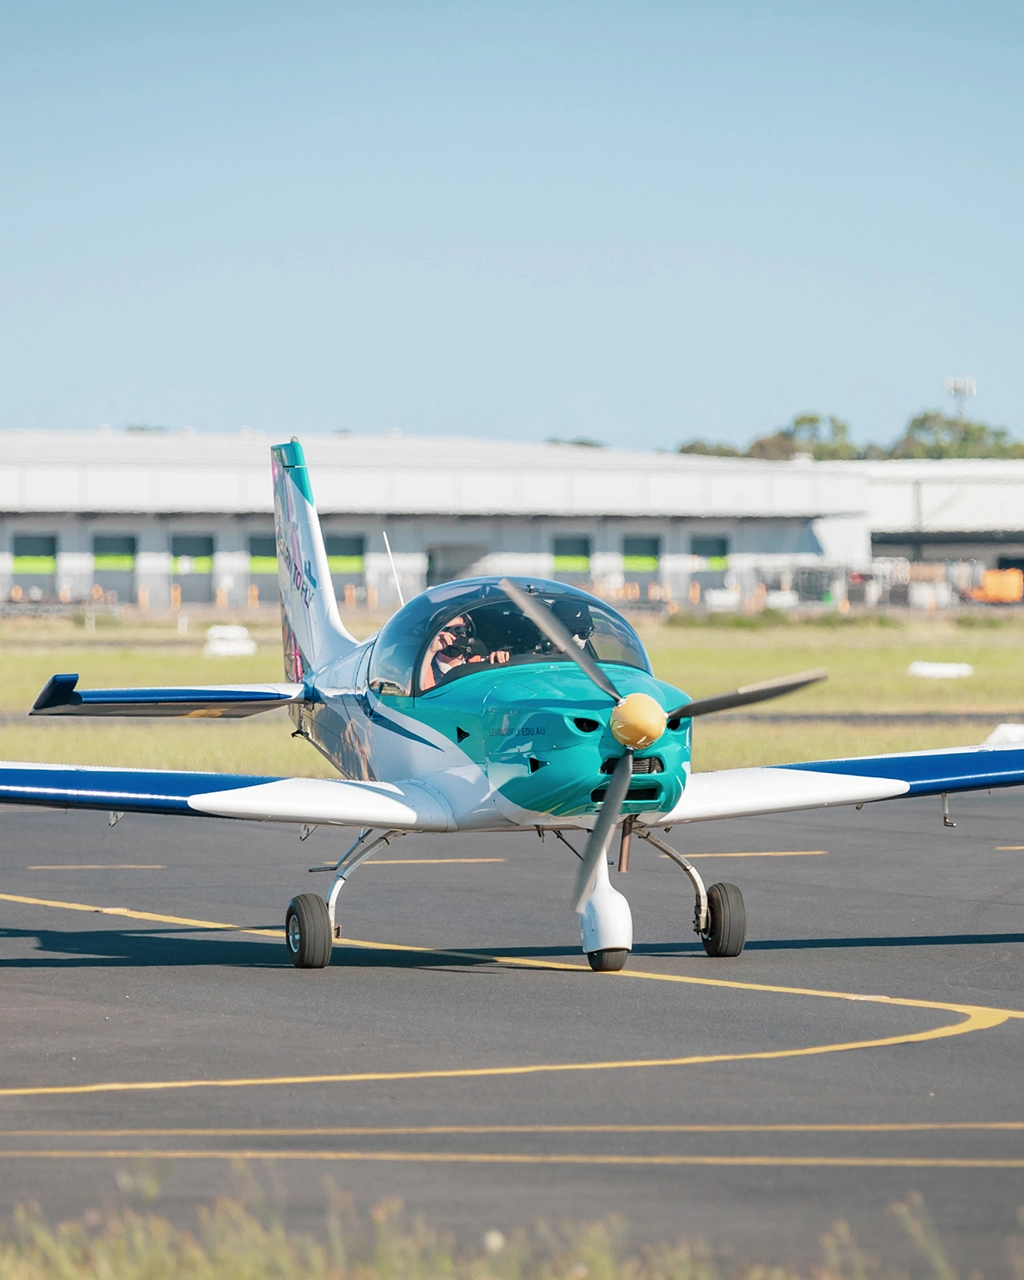
Ready to go

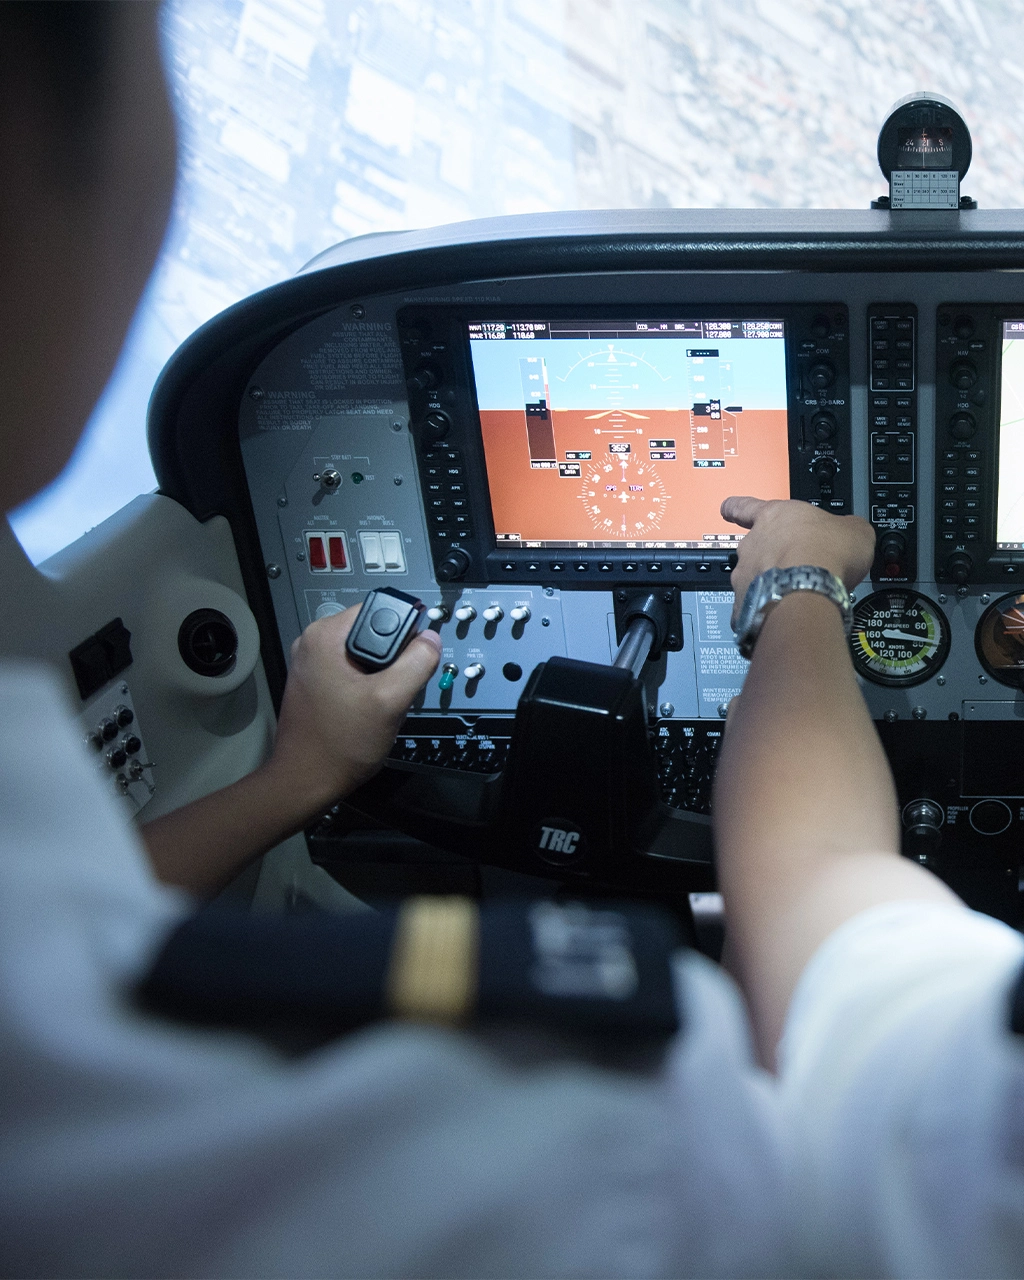
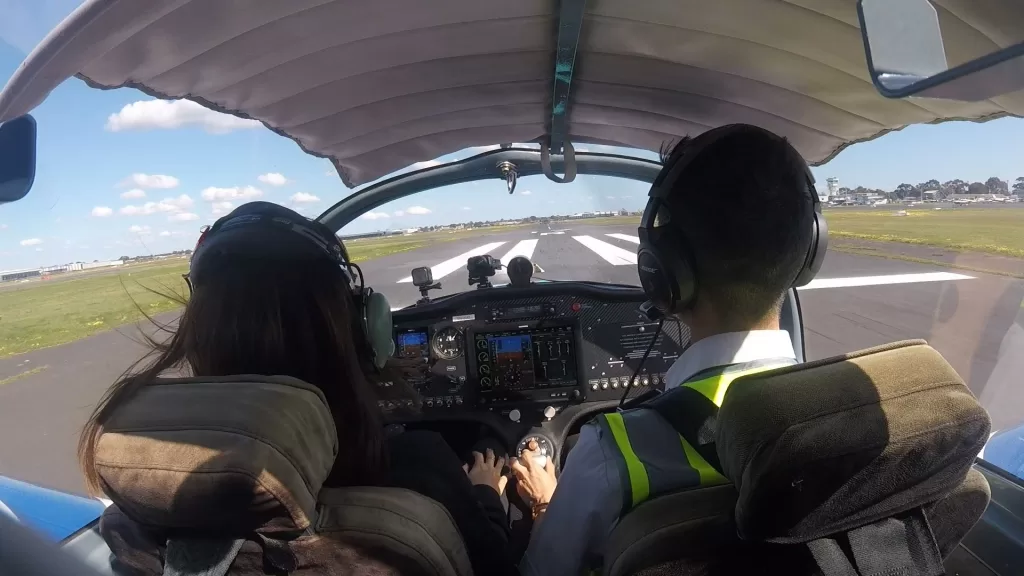
You are lined up on the runway, and ready to take to the skies. It’as always an exciting moment for any pilot. However, discipline must be maintained during the final flight departure procedures.

Ensure you are on the correct runway by looking at your directional gyro, which will indicate the proper runway heading. It’s also a good practice to cross-check this reading with the magnetic compass as well. After that, you should triple-check with making sure that the runway numbers are indeed the intended runway. Everything checks out? Good.

Time to fly!

Now the take-off roll can begin. Ensure that your heels are on the floor and that you are controlling rudders only with the balls of your feet; this will ensure that you do not inadvertently apply the brakes! After you complete this, you should use full power – smoothly but with purpose – and count three, one-thousands before going all the way with to full strength.

After full power is applied, check on the RPM. They should be reading at or above the stated minimum static full-throttle RPM. At this stage, you should also check the oil temperatures and pressures and ensure that these are still sitting within the green range. Finally, you should check to ensure that the airspeed indicator is ‘alive’, meaning that it is indicating an acceleration.

At rotation speed, gradually apply back pressure and lift the nose wheel off the ground, allow the aircraft to fly off the runway and then adopt a Vy (best rate of climb) attitude to ensure maximum climb performance. Look outside! Once you are above 300 feet AGL and obstacles are cleared, move the flaps to up and auxiliary fuel pump (if applicable) to off. You should once again check the oil temperatures and pressures.

The result of following the correct final flight departure procedures? A smooth take-off, followed by another safe and beautiful flight!

Thank you to student pilot Howard Lau for contributing this great series on flight departure procedures.

IMSAFE-For-Pilots
With the final flight departure procedures done, it’s time to fly!

Find out what it feels like to take to the sky! Email [email protected] or visit https://drift.me/learntofly/meeting to book a meeting and school tour.

Learn-To-Fly-Melbourne-Youtube-Subscribe-Footer

Flight Pre-Departure Checks: Flight Departure Processes Part 2

In Part 1 of our flight departure processes series, we laid the groundwork to set ourselves up. In this post, we will go through your flight pre-departure checks. This includes engine starts, taxi checks and run-up checks. Following these checks we’ll be heading to the runway.

Perfect priming

Let’s start our flight pre-departure checks with the most important thing. Safety. Crack open the window and say, ‘CLEAR PROP’. Make sure you give people time to stand clear and scan the area before you move on with your other procedures.

Next, place one hand on the throttle and start cranking the starter, but for no longer than ten seconds each time. If the engine does not fire within 10 seconds, stop cranking right away and wait a minute so the starter motor can cool down. Try some light priming when you’re ready to have another go—it works wonders.

When the engine fires, release the starter promptly. If you’re flying a plane with a fuel-injected Lycoming engine, adjust the mixture to full rich.

Green means go

After a successful engine start, you will need to check that the oil pressure is rising (or has correctly risen) into the green range. This is crucial because oil pressure indicates whether metal components in the engine are sufficiently lubricated.

If oil pressure is not within the green range, shut the engine down immediately and report this to the engineer.

As long as the pressure looks good, you can raise the flaps (if left down after pre-flight), turn on the taxi and navigation lights, and turn on the avionics master switch. Only now should you don and adjust your headsets.

Eyes forward

When taxiing, you should aim to minimise the time you spend with your head down – literally so you don’t bump into anything.

It has become normal for pilots to use GPS devices and iPads (used to run apps like OzRunways) in the cockpit. It is ironic, therefore, that when we attempt to program devices while taxiing we put ourselves at risk of having an accident.

The only exception I make to this rule of my flight departure process is to check the turn instruments. I like to quickly glance down and ensure that:

The slip ball is deflecting properly

The turn coordinator is indicating correctly

The direction gyro turns in the proper direction

The attitude indicator stays erect

The magnetic compass turns in the proper direction.

Remember the CIGAR acronym

I like to do my run-up checks using the acronym ‘CIGAR’. Here is how it works:

Controls – full and free and control surfaces deflect correctly

Instruments – all in the green range, the ammeter is charging and the suction is in the green range

Gas – check the mixture and fuel selector

Airframe – secure the canopy, doors and windows, and make sure your parking brake is on

Run-up – set the correct run-up RPM, check the brakes, check the magnetos, note when the RPM drops (on the Sling with the 912iS engine, one must check that both engine fuel pumps are working), pull the throttle to idle and ensure the engine does not seize at idle

After the run-up, the engine should be set to the ground idle speed as recommended in the POH.

Thank you to student pilot Howard Lau for contributing this great series on flight departure procedures. Stay tuned for the third and final instalment coming soon, as we head to the runway!

Flight-Pre-Departure-Checks
CLEAR PROP! Safety comes first when completing your flight pre-departure checks.

Find out what it feels like to take to the sky! Email [email protected] or visit https://drift.me/learntofly/meeting to book a meeting and school tour.

Learn-To-Fly-Melbourne-Youtube-Subscribe-Footer

Flight Departure Processes: Part 1 of 3

With so many other things in life, it’s easy enough for you to just remember something once you know it. Then it’s no problem to repeat it. Like driving. But flying is different. There are checklists and acronyms (and more checklists) for a reason. There are far more safety considerations when you are flying, and following the right flight departures processes will help to ensure you have a smooth and safe flight, every time.

Walk the walk

A successful and safe flight begins before you even turn on the master switch. It all starts on the tarmac as you approach the aircraft. Your flight departure processes should involve asking yourself lots of questions:

Are the tie-downs done properly?

Are the tyres inflated correctly?

Is there any pink hydraulic fluid around the aircraft?

Is there any blue fluid around the aircraft reminiscent of Avgas?

It has been scientifically proven that asking yourself questions is the most effective way to stay in the loop of information.

Feel the wind

You should not only ask yourself about the aircraft or about the ‘now’ but also ask questions that will bring into effect a successful take-off. Personally, I like to ask myself these:

Should I use flaps or not?

What technique will I use for these conditions? Short field or normal?

Should I delay my rotation for density altitude, load or gusts?

What crosswind correction should I be using during taxi and initial roll?

These questions really are the basis for me completing smooth and safe flight procedures. They help me make sure I’m always ready to respond to new information. On that note, try to make sure you always pay attention to your surroundings. Feel the wind, look at the windsock, listen to the wind and feel the temperature on your skin. Forming attentive habits and looking out for these cues will allow you to prepare for a better flight.

Take it easy

After a normal interior and exterior pre-flight check has been completed, and the aircraft is confirmed to be in safe working order, we can proceed to the engine start. My secret tip is don’t rush!

I’ve had the fortune to fly with the training captain of a major airline in Hong Kong, who is also a tailwheel aircraft instructor and aerobatic pilot. He said these wise words I will never forget, ‘Don’t rush because if you rush you will kill yourself one day.’ I could not believe the severity of his words given his experience in aviation! Needless to say, I listened to his advice.

Get ready for ignition

Before I start the engine, I like to plug in the key, and with the master switch off, I rotate the key to start and then release it. The key should immediately snap back to the both position. This is a simple pre-start ignition check that I learned during my time as an aircraft maintenance intern in Hong Kong.

What this check does is make sure that the starter motor does not engage when the master switch is off, the key locks into position properly and the spring mechanism works.

Prepare the cabin

With the pre-start ignition check completed, I check the cabin. This is when you should adjust your harnesses and seats to your satisfaction, and keep a window or the canopy open. After ensuring that the propeller area is clear, flip on the beacon light switch and the master switch.

Look at your ammeter—it should show a discharge. Check your oil temperature to gauge the amount of priming required or (if it’s the Rotax 912ULS equipped Sling 2 or the Bristell at Learn to Fly) the use of choke. Ensure all circuit breakers are in and the avionics master switch is off.

Wait for it

One of my pet peeves at this stage is pilots who don their headsets before the engine has started. What if someone was trying to get your attention about an unfolding emergency? With the headset on, you wouldn’t be able to hear them. Instead, remove the headset from the dashboard and put it on your lap so you can have maximum visibility out of the windscreen.

An unwritten rule

Set the fuel selector in accordance to the POH and prime as required. After priming, ensure the primer pump is in and locked or, alternatively, that the auxiliary fuel pump is off. If the plane has a fuel-injected Lycoming machine, check that the mixture is set to full rich. If you’re ever in doubt, start with no prime. This will avert the possibility of flooding the cylinder heads due to excessive priming.

Thank you to student pilot Howard Lau for contributing this great series on flight departure processes. Stay tuned for the next part, where we run through flight pre-departure checks.

Flight-Departure-Processes-Female-Pilot
Getting your flight departure processes right ensures the safest start to your flight.

Find out what it feels like to take to the sky! Email [email protected] or visit https://drift.me/learntofly/meeting to book a meeting and school tour.

Learn-To-Fly-Melbourne-Youtube-Subscribe-Footer

6 Ways to Improve Flight Training Efficiency

We are always thinking about ways to help our students get the most out of their flight training course. We believe it’s so important for students to be able to motivate themselves as they work through their training hours. Part of this is applying efficient learning tactics that keep everything progressing at a healthy rate. We are always looking for ways to improve flight training efficiency.

Efficient flight training results in less money and time spent, as well as an overall boost in learning gains over a period. So from every angle, there’s a benefit to the student who finds ways to learn more efficiently. Here are five to get the ball rolling!

1. Preparation

Make it a goal to come prepared. Student pilots who do preparation before their training get more out of their lessons. It makes sense that you have tried to improve your theoretical understanding of flying in between training sessions, you can more or less just work that into practice when you arrive on your training days.

Preparation can mean:

Doing practice radio calls
Studying theory
Knowing the flying pattern
Learning procedures at the training airport

Ask your instructor for details about your next lessons, and for ideas on any extra study that could help you get the most out of it. They will be happy to help!

2. Flight Simulation

Technology has a lot to do with efficiency. If your flying school has a Flight Simulator, you should be making use of it. For the first few lessons of flight training in particular, a Flight Simulator can help you get used to flying procedures. Learning these procedures in the simulated environment first means that time spent in the real cockpit can be used to test this knowledge rather than build its foundation, and it gives you more of an opportunity to hone other aspects of flying.

3. Teamwork

Find a peer to connect with over the course of your flight training. The enthusiasm generated between fellow enthusiasts becomes self-perpetuating and the interaction, both in the air and on the ground, can be highly motivating. If you’re generally quite hard on yourself, this is a great way to get another perspective on the training process and a greater boost from each of your achievements along the way.

4. Reflection

As a student, you should be thinking about the process of flying while on the ground as one of the ways to improve flight training efficiency. This will help you to focus your mind during flight, and get used what to expect and how the flight should progress. It will also help you to get ahead of the aircraft when transitioning to different stages of the flight, such as from take-off to the climb and then cruise.

5. Look for schools offering value

Look for a good flying school with high standards, and when comparing different schools think about them based on the value they offer you. Value doesn’t just mean finding the cheapest course. It combines quality of instruction, aircraft, facilities and of course, pricing. Find out if the school you’re looking at has instructors with a passion for mentoring others, and are not only accruing their teaching hours in order to get into other jobs. High standard flying schools all have one thing in common: they’re there for you, the student!

AL42-Diamond-DA42-Simulator-Learn-To-Fly-Melbourne-Hero
Making good use of flight simulators is a great way to improve flight training efficiency.

Find out how we can improve your flight training efficiency! Email [email protected]. You can also visit https://drift.me/learntofly/meeting to book a meeting and school tour. For more great flying tips and the latest flying videos, click below and subscribe to our YouTube channel!

Learn-To-Fly-Melbourne-Youtube-Subscribe-Footer

4 Important Tips to Help You Prepare For Your First Solo Flight

The time is here! Your very first solo flight! Just like the time you first drove your car alone after getting your licence, the feeling of flying solo can be exhilarating, but very overwhelming. There’s also a higher margin of error, as your instructor will not be next to you to guide you. But, once you’ve read these few tips to help you prepare for your first solo flight and completed all the solo flight training requirements, you’re ready to feel the independence that comes from flying solo!

Go easy on yourself

Remember, you are still learning. Just as when you were first learning how to drive, your reflexes were much slower, you weren’t that good at changing lanes or braking smoothly or at the dreaded parallel parking. That first solo drive must have been nerve-wracking, and you might have wanted to stop the car in the middle of the road and take off running.

Learning how to fly is much the same. You might get frustrated at the time it is taking you to master a new skill or learning how to land safely. But it is important to remember that calm and collected pilots make safe pilots. Stress and anxiety can affect our decision-making powers, thus putting us at risk of making even more mistakes! Remember to take a deep breath before each lesson and remind yourself that you’ve got this, even if it seems like it is taking forever!

Listen to your instructor

Your first solo flight will typically involve successfully taking off, completing a circuit pattern and safely touching back down on the ground without the help of an instructor. To prepare for your first solo flight, you will complete this exact same flight many times with your instructor sitting next to you. Use that time to soak up as much information you can, and use your instructor’s experience.

It’s very important that you listen to everything your instructor tells you, and that you are open to their advice and suggestions. Flight instructors have seen many pilots before you, all with different learning styles and different strengths and weaknesses. When an instructor identifies a weakness in your flying, this is the best opportunity to listen, learn, and make it into a strength.

Mental rehearsal and practice on the ground

In the days leading up to your first solo flight, practice flying mentally. This involves sitting on a chair and visualising that you are flying the circuit and thinking of how to fly the plane. It’s not even a bad idea to do this after every flight lesson, in order to make your movements muscle memory. This will save you time trying to figure out what comes next when you actually fly solo when it comes to procedures, radio talk and check as these things will already have become automatic by then. This method of training is also known as “chair flying”.

You can also prepare for your first solo flight by using a flight simulator. A flight simulator allows you to understand the controls and mechanics of the cockpit and repetitively practise taking off, manoeuvring, and touching down without ever leaving the ground. This is a safe way to gain the skills and expertise required to be able to fly solo.

Trust yourself

Finally, once you have successfully completed your solo flight training and your instructor deems that you are ready to take the aircraft on your first solo flight, it is important to trust yourself and trust the skills you have been taught. Get some good sleep every time before a solo flight and don’t let the negative thoughts take over. You know what you are doing and you have practised hours upon hours for this, both physically and mentally.

It might seem daunting at first, but once you step into the cockpit, you are likely to remember everything you have been taught and you will successfully complete your first solo flight like a bird flying in the sky—naturally and effortlessly. You’ve got this!

Prepare-for-your-First-Solo-Flight
As you prepare for your first solo flight, just remember… You got this!

Want to experience flying solo? We have a range of courses to get you there. Email [email protected]. You can also visit https://drift.me/learntofly/meeting to book a meeting and school tour. For more great flying tips and the latest flying videos, click below and subscribe to our YouTube channel!

Learn-To-Fly-Melbourne-Youtube-Subscribe-Footer